Showing posts with label envelope. Show all posts

Wednesday, June 4, 2014

Dance Teacher Gift Card Holder


My son has been doing an all boys dance class since November.  They do tap, jazz and tumbling.  He really has enjoyed it and his teacher is wonderful with 8 boys ages 3-6!  His recital was Saturday so I wanted to make her something she could use in the future and what dance teacher doesn't need music so this holds an iTunes gift card.  The best thing is it's made with an envelope, how clever.  Wish I could say this was an original idea but found a video on Pinterest here.

I created the "record" circle on My Digital Studio then designed the rest from that.  You can order any/all of these supplies by clicking on the picture that will take you directly to my online store. (http://brittnysmith.stampinup.net - SHOP NOW)
*Please note, some of these supplies might have retired depending on when you look at this post.  If you do not see the item, check the clearance rack.  Otherwise you will need to substitute with other products.

Print Recipe

Product List

Saturday, May 5, 2012

Q & A

Q: Recently I saw a cute card with a small, patterned paper envelope on the front. How do you make those?

Paper Envelope Sample

A: Envelopes in a variety of sizes have become all the rage since the Diagonal Plate for the Simply Scored Scoring Tool was introduced recently. The Diagonal Plate makes creating envelopes a breeze – no more templates to trace and cut by hand! Hooray! Plus, envelopes are a great way to show off our beautiful double-sided Designer Series Paper without feeling guilty that we are covering up one of the patterns! While the Diagonal Plate comes with instructions and measurements to make four popular envelope sizes, one of my favorites is the small envelope for love notes!

Here’s how you can make the 3-1/8” x 3-1/8” envelopes to hold 3” x 3” love notes:

Envelope Pattern
Step 1: Cut a 5” x 5” piece of Designer Series Paper or card stock. Place the Diagonal Plate on the Simply Scored Scoring Tool. Place the paper on the Diagonal Plate. Score the first side at 2-1/4”. Rotate the paper 1/4 turn or 90 degrees. Score at 2-1/4” again. Repeat until all four sides are scored.

Step 2: Fold and crease all four score lines. Use a Bone Folder for crisp folds. Use Paper Snips or Square Punch to cut out the triangular scored sections.


Step 3: Fold in two side flaps to create the sides of the mini envelope. Add SNAIL, Sticky Strip, or Multipurpose Liquid Glue to the very edge of the bottom flap. Fold that flap up over the side flaps and adhere. The envelope is now complete!


You can add the envelope to the front of a card or a scrapbook page. Or use it to hand deliver a special little love note. You can use adhesive to close the top flap, tuck the flap inside the envelope, or use a button or brad and a bit of Baker’s Twine to create a fastener.

Have fun discovering all of the fun envelopes and envelope projects you can create with the Diagonal Plate!
© CraftyPerson Production. Images © Stampin' Up!

Note: This is part of my monthly newsletter that I send out to my subscribers.  If you would like the whole newsletter each month, leave me your email address in the left sidebar where it says to "subscribe to my newsletter."  You will begin to receive my newsletter the following month.


Saturday, March 31, 2012

Wedding Card Envelope

Like my post yesterday being able to finally have a reason to make a card that I've always wanted to; I have always wanted to decorate my envelopes but never have.  I was always afraid that the mail wouldn't accept the envelope and it would be ruined.  And usually when I pass out cards I don't waste an envelope unless it's necessary to have the card hidden.

Since I knew that I wouldn't be mailing this card and had a reason to keep the card hidden, gave me the reasons I needed to decorate the envelope finally!!

Closed

Opened

Card with outside envelope

I used the same stamp set as I did with the card Baroque Motif.  I love how people use the Designer Series Paper on the inside of envelopes so I wanted to incorporate that.  My intention was to cut along the top flap so you only see the DSP when it's opened but loved how this looked when I left some showing.  I just rounded the corners to match the flap.  Finally, I had to figure out how to close it, since I covered the seal with DSP.  I saw this technique at Regional and was so happy I remembered it.  I think it just adds such a cute touch to the card and allows the recipient to unwind the twine so the envelope isn't ruined!

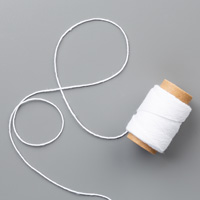
Here's how to do it: Punch 2 hears with the Small Heart Punch than a adhere to envelope with Stampin' Dimensionals.  Add Rhinestones to the center and cut some Bakers Twine (I used white) and wind around hearts to close the envelope.

Simple but I love how this envelope turned out to go with my wedding card.  I might just have to do this more often now that I love the added touch the decorated envelope gives my handmade cards.