Thursday, June 28, 2012

Demo Swaps

I have such a great group of ladies that are my upline.  I get so much inspiration from them that when one of them hosts a demonstrator swap, I jump at the opportunity.  Here's what I came up with for this time.


The swap required anything from the new 2012-2013 catalog, nothing retired.  I wanted to use some of the new products myself so I knew this was a perfect opportunity.  We had to make 11 swaps and this took me some time because it required a lot of runs through my Big Shot but I think it was worth it.  I love the color combinations and how this card turned out.  What do you think?

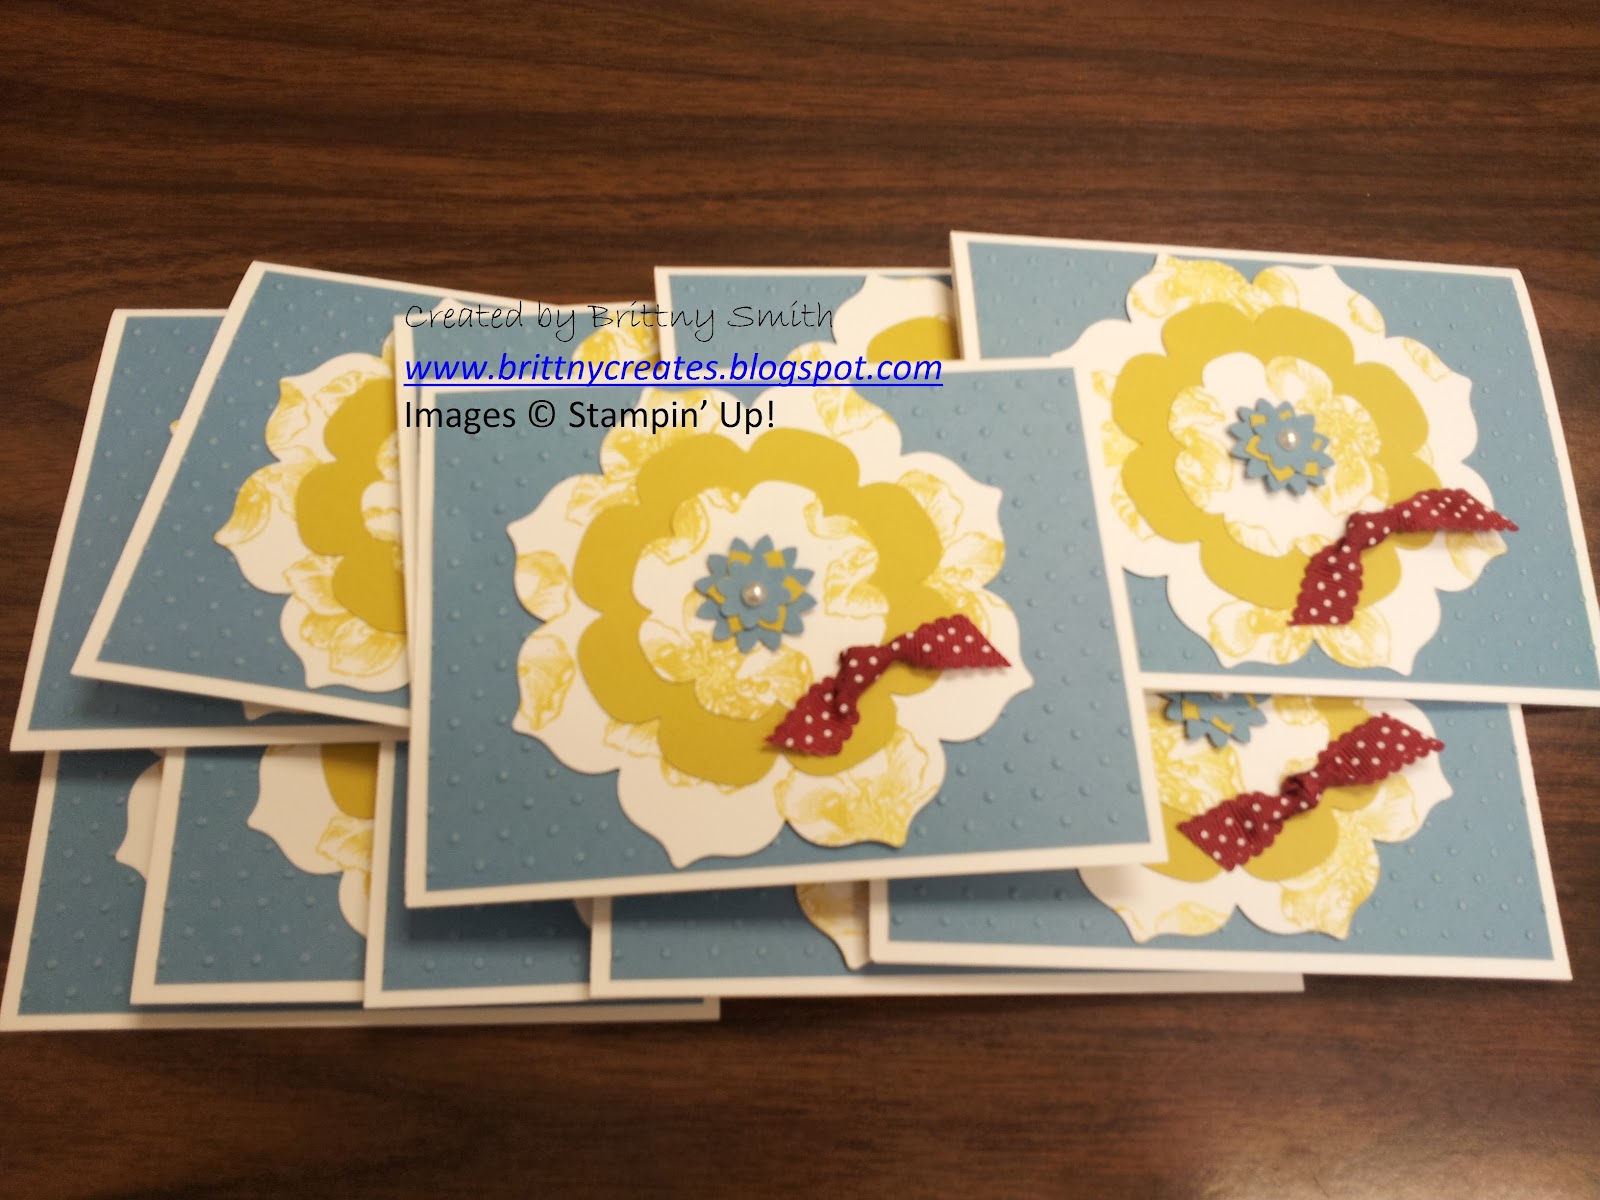
All 11 ready to be shipped out!
I saw a neat technique done by Mary Director called layered stamping.  If you look closely at my flowers, you can see that it looks like the stamped flowers match up on the white layers; hence layered stamping!  It's a neat technique and love how it makes the flowers flow together.

I didn't put a sentiment as I thought it could go for a bunch of different occasions.  I figured the person who has it and uses it could add their own if they feel it needs one.

Supplies needed to make this card:

Card Stock: Whisper White
                     Marina Mist
                     Summer Starfruit (new in color)

Stamp Set: Everything Eleanor (new to 2012-2013 catalog)
Everything Eleanor Clear-Mount Stamp Set

Ink: Summer Starfruit

Accessories: Cherry Cobbler 1/2" Scallop Dots Ribbon
                      Basic Pearls Jewel Accents
          Tools: Big Shot
                      Perfect Polka Dots Textured Impressions Embossing Folder Die
                      Floral Frames Framelits Die
                      Boho Blossoms Punch
      Adhesive: Snail
                       Mini Glue Dots
                       Stampin' Dimensionals

Monday, June 25, 2012

Special Events Cookie Stamps

Here is the newest cookie stamps called Special Events that are in the new 2012-2013 catalog.
These are the three stamps that you get when you order these stamps.  You also receive the wooden handle to interchange these rubber stamps along with a sugar and shortbread cookie recipe.

These have become my go to food item when I am going to a party or having a Stampin' Up! event myself.  I always make cookies to stamp on and people seem to love the image that comes out on the cookies.  They are so much fun and easy to use as well.  I'm looking forward to making red, white and blue cookies using the star stamp for our upcoming fourth of July parties in the coming weeks.

Here are examples of the newest Special Events cookie press stamps that I had at my open house.


I tried different sugars for decorations. If you want to achieve this affect on the cookies, pour the colored sugar into the stamp, flatten the cookie dough on top of the stamp than carefully flip the dough onto the cookie sheet and finish pressing the stamp into the dough. I just love how the sugar adds such a nice touch to the stamps.

You can order these new cookie stamps through my site www.brittnysmith.stampinup.net


Friday, June 22, 2012

Ice Cream Card

I had my open house last weekend and created this card to go with the ice cream social for the make and take.  It's very simple and just think it's so cute.  I love the colors which are all new 2012-2014 in colors.  Can you name them?


I wanted to show how you can take a simple card like this and "step it up" as we Stampin' Up! demonstrators like to call it!  I changed/added four things on this card to "step it up."  Can you figure out what I changed from the simple card?


  • I used the new Finishing Touches Edgelits Die on the ends of the designer series paper and white card stock. (This counts as 1 and 2)
  • I embossed the midnight muse card stock using the new Argyle Textured Impressions Embossing Folder.
  • I added the cherry on top from the Cupcake Punch.
This didn't take much longer to do these extra steps but what a difference those little things make to your card.  So when you feel like your cards need something else to make it "pop," just think of "stepping up" what you already have on your card!

Thursday, June 21, 2012

2012 Open House

This past weekend I had my open house for the new catalog.  It was an ice cream social.  I had a lot of fun preparing everything for the event.  Here are some pictures.

Catalogs and promotion table

Sweet pressed sugar cookies using the newest stamps
Ice cream and toppings ready for the guests
I created these banners on the stick and spoon to identify the toppings and not mix up the spoons.  They were created using the newest framelits called Bitty Banners


My boys eating their ice cream!


Make and take table


Make and take card


Wednesday, June 20, 2012

Cupcake Birthday Card

I made the following card for a girls 4th birthday.


I just absolutely love how this card turned out.  I've tried a new technique that I've seen all over the place but never tried it called faux quilting.  My upline Jeni Szmyd actually introduced it to me and I've been dying to try it out. (Click on her name to see her version of a card using this technique.)

This technique uses the Big Shot and the Square Lattice Textured Impressions Folder.  Cut out the shapes you want than adhere onto the card stock.  Finally run the card stock through the Big shot and folder and wah-lah, you've created a pretty cool looking quilting background.

I've added a few more circles to add a little more dimension to the card.  Love this technique and the possibilities are endless so I'm looking forward to using this on more of my cards.

The other new thing about this card is the green card stock and ribbon.  This is one of the new in-colors called Gumball Green.  Love this color and how cute is that new ribbon?  You can order that ribbon in all of the new 2012-2014 in colors.


Supplies needed to make this card:

Card Stock: Melon Mambo
                    So Saffron
                    Whisper White
                    Gumball Green

Stamp Set: Easy Events (I did not use the "happy birthday" saying under the cupcake)
Easy Events Stamp Set - by Stampin' Up!
Ink: Gumball Green Classic Ink Pad
        So Saffron Marker
        Melon Mambo Marker
        Gumball Green Marker

Accessories: Basic Rhinestones
                     Dazzling Details
                     Gumball Green 3/8" Stitched Satin Ribbon
         Tools: various sized Circle punches
                     1-3/4" Scallop Circle punch
                     Sizzix Big Shot
                     Square Lattice Textured Impressions Folder
         Adhesives: Snail
                            Mini Glue Dots
                            Stampin' Dimensionals

*Stay tuned for a video tutorial on how to make this card next week*

Thursday, June 7, 2012

New Ink Pads with Shannon West

The following video is a great example of how to use the new ink firm foam pads instead of the old felt pads.


Q and A

Sending Cards
 Q&A

Q: I love receiving cards in the mail. Any suggestions on how to remember to send cards for any occasion?

Sending Cards

A: That is a great question! We all love the art of making cards, but sometimes it’s hard for any of us to remember special occasions, write a note to a friend, or even let go of a favorite card! (Yeah, we’ve all been there!) We’ve all seen ideas that sounded great and then when you think about it you know it will fit in your life or you think to yourself sarcastically “yeah, that’ll happen”! So, I’ve got a suggestion that will work for planners and those whose schedules are loose. Here are a couple of tried-and-true tips that will put you at the top of the thoughtful friend list!

Plan a Moment
If you are a planner, you’ll love this tip. Plan a time into your schedule each week for writing cards. Now this doesn’t have to be a big event; even 15 minutes that you can take to reach out to those you care about is great. I recommend stamping a whole stack of cards - they don’t have to be specific to the person, and keeping them on hand so that you can quickly add a note and get it in the mail. As much as we love the art of stamping, the true magic comes when you share that connection with someone else. Start by checking your calendar to see who has birthdays, anniversaries, graduations, etc. coming up. Next, take a few moments to reflect on your week. Who touched your life this week in a way that makes you grateful or who could use the pick-me-up of a thoughtful note? Now write a couple lines - it doesn’t have to be a lot for someone to know that you care.

Sending Cards

Grab a Moment
If the idea of planning a time to sit down makes you crazy, then don’t! Make a "to go" card center that you can use to write notes when you have a moment and the mood strikes you. Our clear-mount stamp cases are ideal. Just add a bit of your favorite Designer Series Paper under the cover and fill the case with a couple of cards, envelopes, a pen, and stamps. Now drop it in your purse or your car. Next time you are waiting for an appointment, sitting in the carpool line, hanging out at a kids sporting event, taking a lunch break at work, or whenever it is you have a minute, you can open your card case, write a quick note, add the address and stamp, and drop it into the mail. It is easy, fast, convenient, and a thoughtful way to make the most of those little moments.

Take a Photo
If you are like most stampers, you are afflicted with the “I can’t let it go” bug. You know the feeling - you love a card, want to remember a technique, plan to re-create more just like it, so you hold onto the card instead of sending it. Stop it! Cards are meant to be shared! But you can still keep the look, idea, and reminder by snapping a quick photo with your camera or cell phone. Save the photos in a file for card ideas or several files by stamp set, occasion, techniques, whatever it was that made you love the card. Now keep the photo and share the joy of the card by sending it and everyone wins!

Share the Magic
Unlike email that gets buried and forgotten, a hand-stamped card is a physical reminder to those that receive it that you thought of them, that you care, and that they are special. So hand-deliver or mail a card today. You’ll love the feeling you get from giving, and you’ll brighten someone’s day in a very special way.
© CraftyPerson Production. Images © Stampin' Up!

Monday, June 4, 2012

Take the Cake


During June, new demonstrators not only get to choose the products for their fully customizable Starter Kit, they'll also get products from the brand-new Patio Party Suite for FREE, including the Make a Cake Set, Patio Party Designer Series Paper, and the Patio Party Digital Collection DVD! That's up to $48 in additional FREE products!

Page
Item
Description
Retail Value
44
126740
Make a Cake Set (wood-mount)*
$14.95
44
126742
Make a Cake Set (clear-mount)*
$11.95
165
126916
Patio Party Designer Series Paper
$10.95
199
127215
Patio Party Digital Collection DVD
$22.95
*Choose wood- or clear-mount; clear-mount set does not include clear blocks

This is a great time to join my team and become a Stampin' Up! demonstrator.  I love being apart of this company and there are so many great benefits of being a demonstrator.  I love ordering my products at a 20% discount, plus getting the catalogs and ordering before anyone else can.  The added income I can bring in for my family is also great!  These are just a few of the reasons I am so happy to call myself a Stampin' Up! independent demonstrator.  If you are interested in joining me on this great adventure, contact me at brittnycreates@gmail.com or start today by heading to http://brittnysmith.stampinup.net and click "Join the Fun."  You will be taken through the process of becoming a demonstrator yourself and joining my team!!

We {Heart} Our Hostesses


During June and July, hostesses who hold a minimum $450 workshop will receive an additional $50 in hostess FREE merchandise dollars

For example:

Your Hostess' Party Sales: $450*
Regular Hostess Benefits: $65 plus 1 item 50% off
Additional Hostess Benefit: $50
Total Hostess Benefits: $115 plus 1 item 50% off
*Excluding tax and shipping


This is a great time to host your own party so you can get lots of those items you want from the new catalog for FREE! All you have to do is invite your family and friends to your home and I do the rest. I have a bunch of June and July dates available if you are in the Pittsburgh, PA area and would like to host your own party contact me at brittnycreates@gmail.com.

If you are not in the Pittsburgh area and would like to earn FREE product, you can request to do a catalog party. I'll send you catalogs and all you have to do is collect orders from your family and friends. I'll place the order and you receive the FREE products! Contact me at brittnycreates@gmail.com if you are interested in having a catalog party.


Friday, June 1, 2012

My First Video!

I finally got the courage to create my first video. It's nothing creative, just an introduction and catalog tour. I was surprisingly not as nervous as I thought I would be filming myself and talking on camera. There were definitely some hiccups (having to switch from my phone to normal camera back to my phone) which affected the quality. I enjoyed editing and putting the video all together so I know that I will enjoy creating videos for you.  So, I hope you enjoy it and leave me a comment with your thoughts.  I plan to feature techniques and projects on my videos in the near future so subscribe to my YouTube channel Brittny Creates to know when I post videos.